Left Wing Inspection Cover

So close to Christmas and it is clear that the left wing will not be done by the 25th.  Work is the main culprit as Tim tried a couple times to connect  with me but I was fighting against a shipment deadline for equipment on ‘critical” project.  I made my own bed and slept in it but I question if in 10 years that it will seem all that critical. Getting this plane in the air and spending time with my family and friends has to be a bigger priority. Something to work on.

Well, today and yesterday were pretty good as far as the getting things done on the plane.  I almost made a mistake today that would have set me back more than a few days.  I’ll get to that  but first the progress.

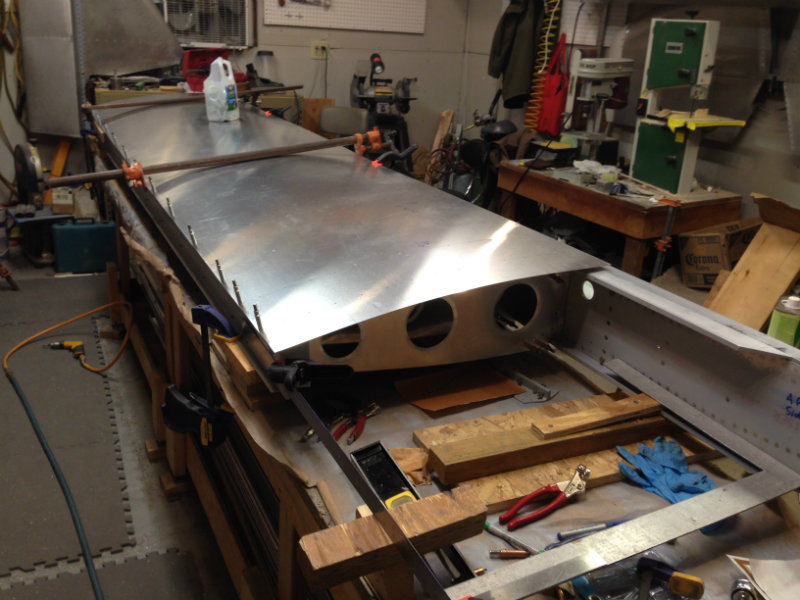
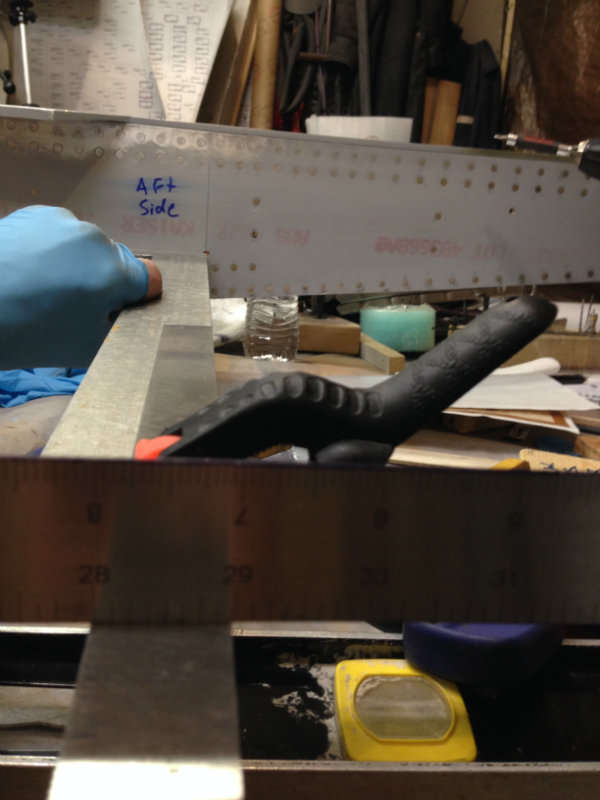
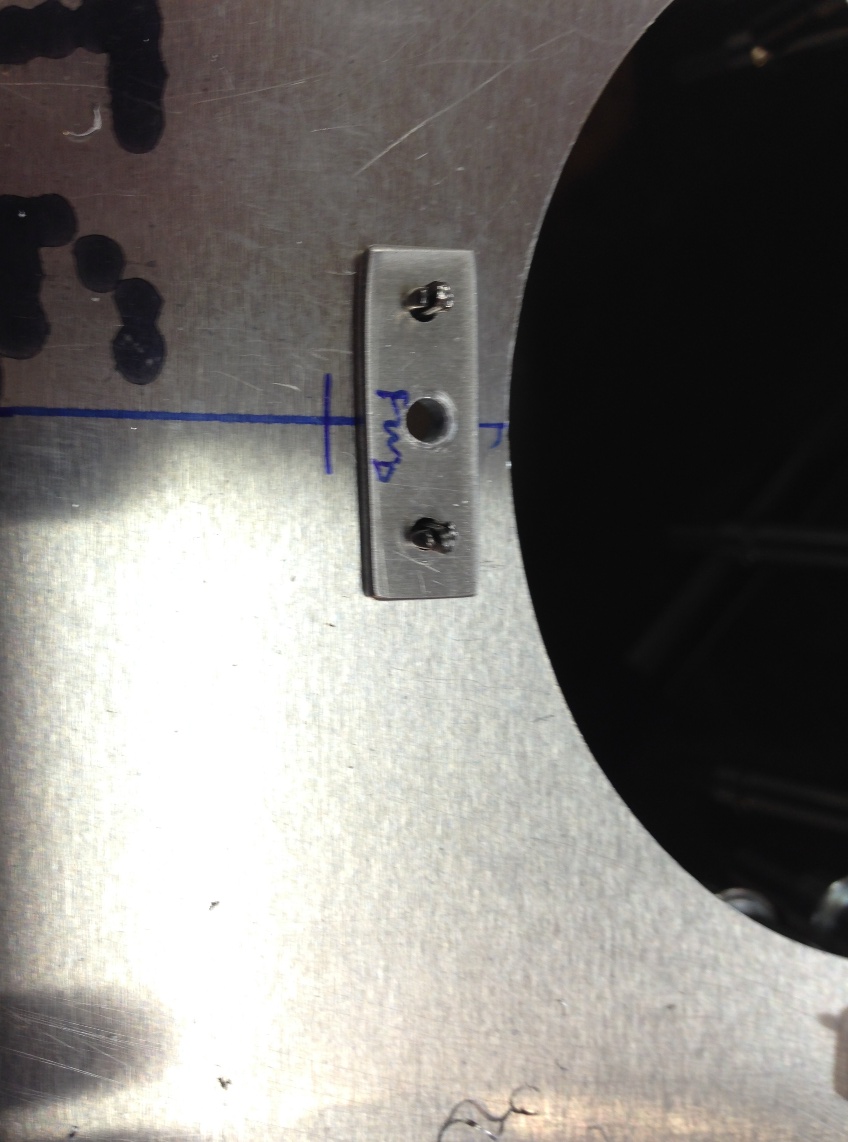
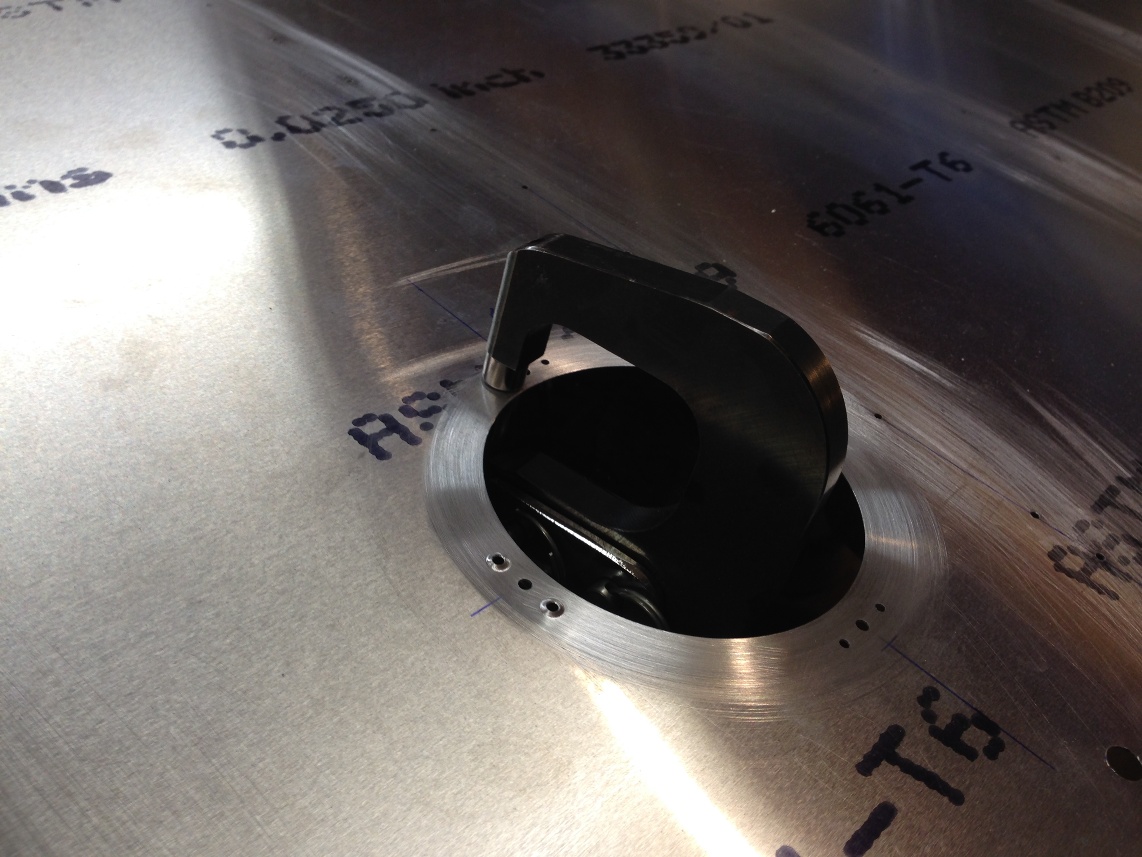
Yesterday, despite numerous interruptions with honey do list things, I was able to start and finish the inspection cover and the cut out for the tie down in the lower skin. I really like the squeezer that Gary Hall loaned us.  It is really the ticket for installing nut plates.  Tim and I decided to  use nut plates to mount the inspection covers.  While I am behind the decision it turns a 3 minute drill and screw into 3 hours when you want to have the screws countersunk (self tapping screws are what are called out on the plans).  I have a few pictures  but to make sense of what is going on I should explain that buying countersunk nut plates would be faster (and probably smarter) but what we had were a large collection of flat nut plates.  I don’t know the MS number for the nut plates we have but I thought it would be easy enough to just add a small piece of aluminum behind the skin to provide the depth to counter sink for flush mounting rivets and mounting screws.

The procedure is pretty straight forward but it is important to keep track of what holes should be drill first and at what diameter in order to best keep everything aligned.  The procedure I followed was this:

1) drill major inspection hole and make a cover

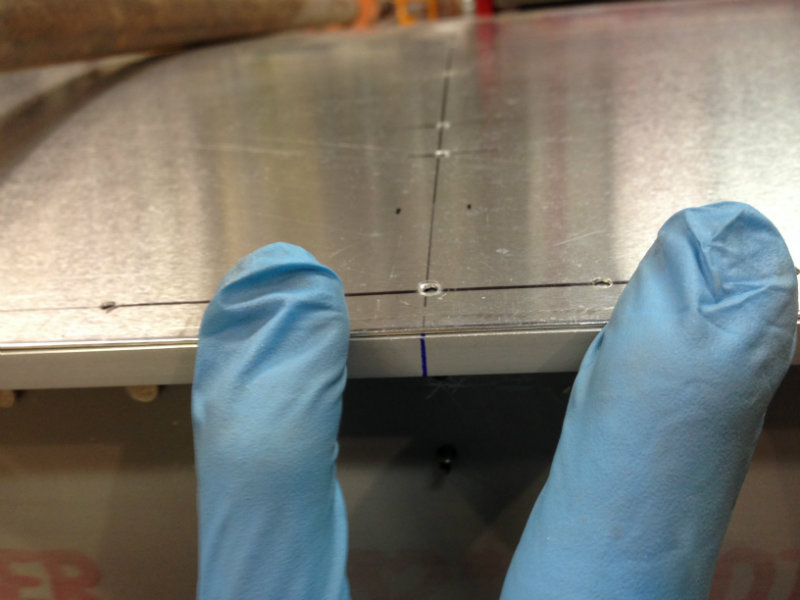
2) Mark the center line and cross  line for screw holes in cover and skin

3) Drill screw holes with #40 bit in cover

4) Align and match drill screw holes to align cover to skin

5) Cleco nut plate to skin and drill mounting holes with #40 bit.

6) Cleco cover to skin and updrill to #30.

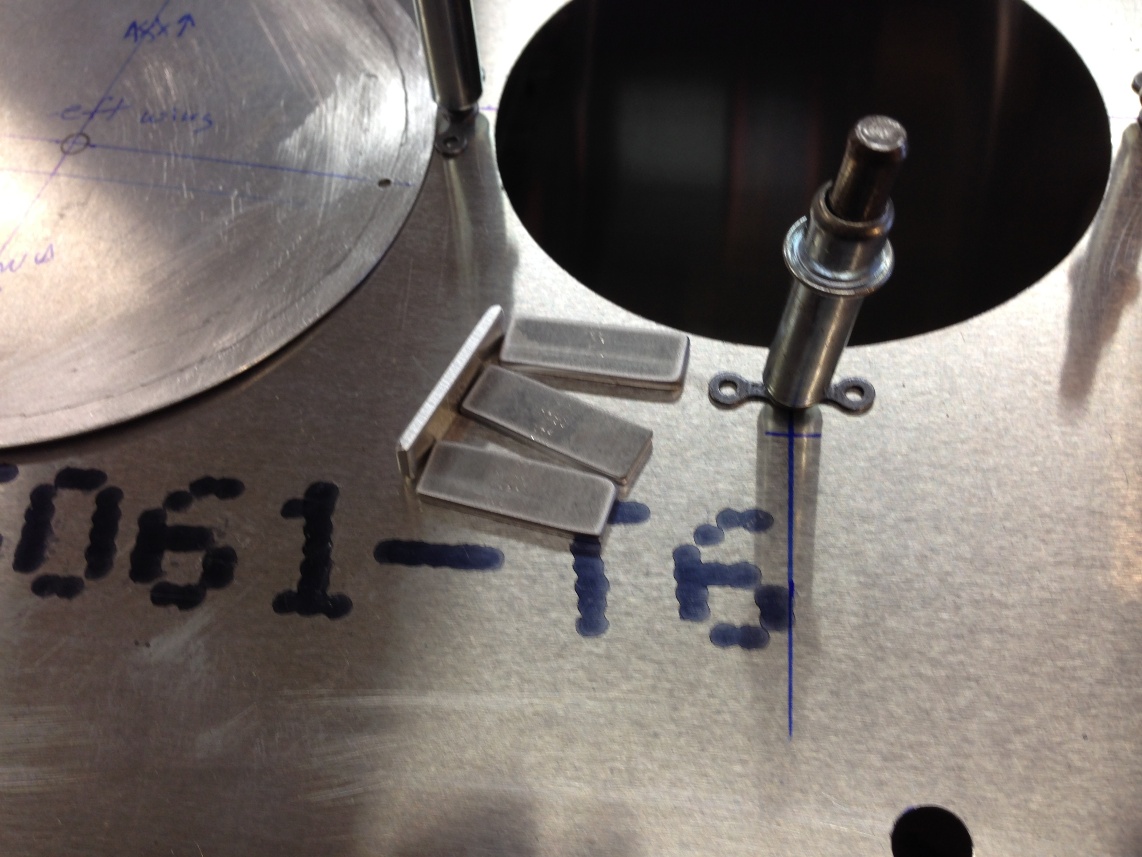
7) dimple cover and skin for screw (this will likely be a #6 dimple die

8) updrill (match drill) previously dimpled holes to #21 (for ample clearance for screws)

9) dimple mounting holes on skin

10) cut small blocks of 0.060″ to mount nut plates.

11) match drill aluminum blocks to nut plates.

12) counter sink aluminum blocks for counter sink depths on skin for mounting rivets and screws.

13) debur and prime mounting blocks and skin.

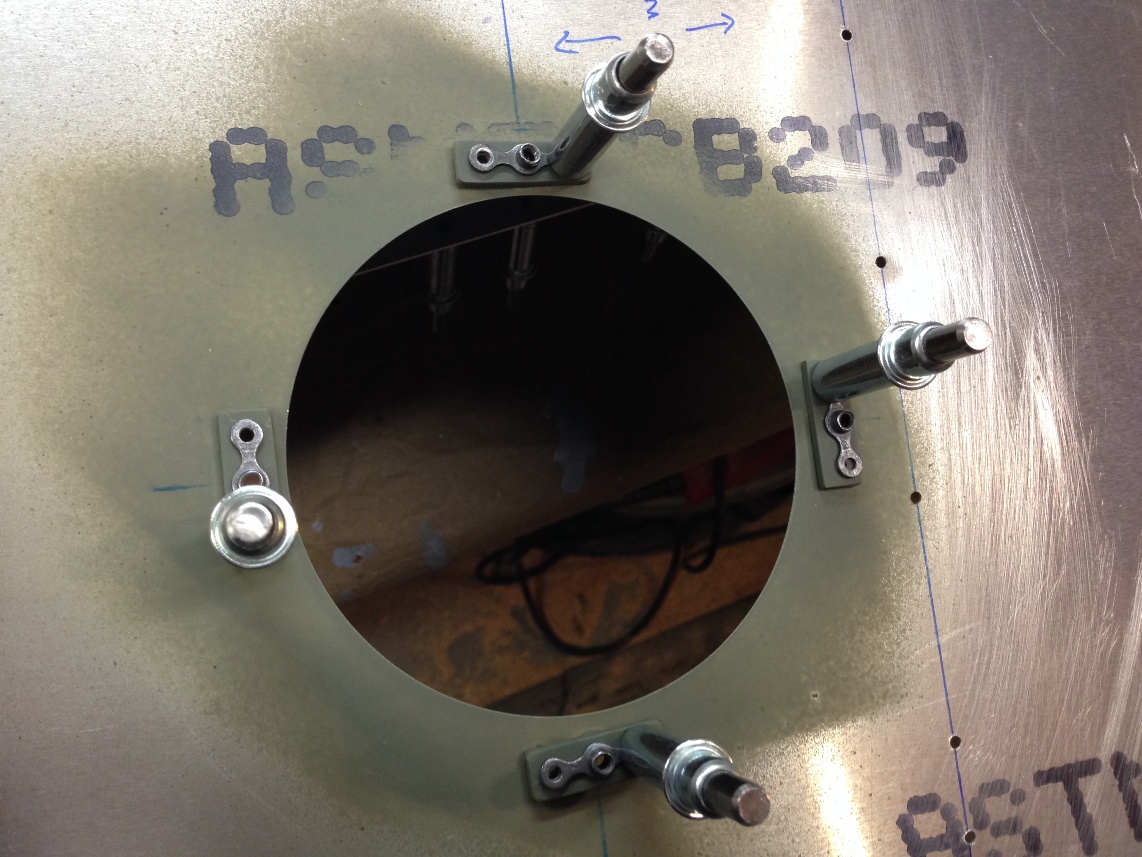
14) rivet aluminum and nut plates to skin (this is where the squeezer works so well.  Just by measuring the stack up of parts the rivets can be cut to length and the rivet squeezer can be set to the proper compression and it works like a champ)


Only 14 simple steps and you’re done.

Return To Left Wing Assembly

Left Wing Bottom Skin Level And Match Drill

Today was perhaps a good example of how quickly things can move along in the assembly process if all the parts are made (like a kit, instead of scratch building as we are) and if we don’t mess around thinking too hard about stuff.

Tim was busy until around 1:30 and I had a load of issues to attend to with regard to work (I so much for vacation but at least I could take care of it without leaving home).   The morning was spent catching up on email and getting things prepped for dinner (gotta keep the “sweetie” happy).  After all that it was almost 12:30 before I got into the garage to even turn on the heat.  I was in the garage actually doing something by time Tim arrive.  I had been on a conference call and simple kept my headset on while on mute and listening in as i drilled holes in the skin to finish the top side match drilling.

When Tim arrived i had the match drilling pretty much done and while I pulled out the bottom skin Tim cleaned up the rear spar trailing edge to file off any alignment error between the skin and the spar.

We flipped the wing over and Tim aligned the bell crank brackets to the upper skin while I worked to level the then skin by supporting each of the four corners with blocks and shims to insure the wing was flat (not having any wash out or pitch variation from root to tip.  

Left Wing Level Bottom Side Up

The process of squaring and leveling the wing (as mentioned earlier) can be done a couple different ways but the bottom line is that (in my view) you need to have an image in your mind of the process you are involved in.  I spent a good part of my youth working for my “old man” building houses and even did it for a few years before and during my college years.  The process of squaring a wall so that when you stand it up it will be plump is very similar to assembling a wing to be square and not have any wash out. For me it is almost an intuitive process that I know most framing carpenters would find easy.

The process can be broken down into two primary steps.  The first skin must set the wing with regard to square (which is not terribly hard but a bit of a challenge to find a reference).  The second step, once the wing is held square by the first skin, is to insure it is flat (no wash out).

To square the wing it is also a good idea to have it close to level, although not necessary to be exact, it will be needed on the second side skinning so the procedure is good practice.  Once level it is easiest to find four points that define a parallelogram. The first two points on the skin are the wing station 22-3/4″ center line at the center of the main spar and the trailing edge of rear spare at the same 22-3/4″.  These two points will be  marked on the upper and lower skin as the intersection of the center line (where the holes are drilled) and the edge of the skin.  If you cut our skin carefully (as you should) the final width should match the plans and the skin should be square (don’t trust factory cut sheets of aluminum to be square).  Even though the root and the wing tip have very irregular contours, the center line of the first rib in from each end (rib #1 and rib #12) should form a perfect rectangle on the wing skin.  The second two points are the same position on theT #12 rib. The key characteristics of a rectangle is that each of the opposite sides is the same length and the angles where the adjacent sides intersect should form 90 degree angles. The wing skin when laying flat provides a perfect pattern to align the wing box.  The only task that remains is to identify the reference point that make a rectangle on the skin, and mark them on the wing box.

To really describe the above process i need to generate a picture or some sort of graphical layout.  maybe that will be a task for later.

Once the wing is held square by the skin on one side of the wing, attaching the second side will give the wing 3 dimensional rigidity.  Holding the wing flat, or vertical and planar, when skinning the second side will insure that there is no wash out in the final wing structure.

If all of the wording above is confusing, I hope it is because of my poor explanation and not the readers inability to understand the concept of square and flat.  Otherwise, you are doomed.

Wing Skin Drill Jig For Between Ribs

The bottom line for the  night.  The bottom skin is fully match drilled and the inspection hole is cut.  Tomorrow I need to determine if I want to add the fwd ribs and skin or updrill the aft ribs.  it probably does not matter but immediately after the leading edge is skinned I will proceed to cutting in the landing light for the left wing. That could happen tomorrow…

 Return To Left Wing Assembly

Left Wing Skinning Top

Left wing skinning

December 15, 2013

The left wing is expected to go much faster than the right as all the parts have been pretty much completed and the right wing assembly included welding the control rods.  In a sense, the left wing assembly should go at least as easy as building from a kit, maybe even easier since the right wing had just been completed so the assembly procedures were well understood.

The left wing box had also been assembled and updrilled to #30 (1/8″) as well but none of the gussets had been riveted and the majority of the ribs were not deburred.  Although the ribs needed to be deburred again after being match drilled to the skins, I was thinking of riveting the gussets to the ribs before assembling the wing.  Plans changed and I ended up working the last two days of the week, contrary to my original plans.  This led to not having all the ribs ready to prime and rivet the gussets so I chose to begin assembling the wing box on Saturday morning.

Tim and I got together on Sunday afternoon and while he finished deburring the missing aft ribs I finished deburring the fwd ribs.  After the aft ribs were deburred and clecoed in place the wing box was leveled, squared and clamped to the bench top.  

Tim and I discussed how many builders skin the wing vertically while I was proceeding as I did on the right wing by leveling and squaring it while flat on the table.  I am confident either would work and any discussion on which might be better might be a waste of time.  I feel it is easier to constrain the wing when it is flat on the table, which is my primary reason for why I would rather have it horizontal on the table.

Anyway, once Tim was comfortable with what I was doing (or tired of going over the procedure verbally) we moved forward and found a location that was as level and square.   We then laid the pre-marked top skin on the box and checked the alignment of the marked hole center lines that were yet to be drilled, with the centers of the ribs.

We then checked the only reference dimension on the prints that provided an alignment for square.  This was the wing station zero point (also the center of the wing span) to the rear spar attached hole.  This measurement was supposed to be 19.0″  The original measurement we checked did not come up to 19 inches  but after a little review it was apparent that there was a bend in both thee main and rear spar that was distorting the measurement.

Tim had to leave and so I had time to drill the top skin and mount it on the wing box.  Mounting the skin provides an easy method to straighten the spar out by match drilling the rear spar, beginning from one end and making sure the trailing edge of the spar was flush with the wing skin.  After this is done the wing can be squared by checking that the centers of the drill holes aligns with the rib centers at the ends (the middle of the ribs are unreliable as they tend to wander a bit until match drilled to the skins).  It is the rib centers marked on the spars that make the best reference for the skin hole centers.

With the aft spar match drilled to the skin the wing box can be clamped at the main spar and the 19″ reference dimension can be checked.  This time the measurement came out to as close to precisely 19.0″ as I can measure.

Left Wing Station Zero
Left Wing Station Zero Ruler Value
Rear Spar Bolt Hole For Measuring Wing Square-ness

I have pictures of the 19″ reference measurement as well as the alignment of the skin center lines with the rib center lines.

A few pictures of the semi finished match drilled skin and wing box and that is about as far as i am going to get tonight.  Tomorrow Tim and I expect to both be able to work on the plane during the day as we both have “vacation to take up” as my friends if Singapore say before it evaporates at the end of the calendar year.

Return To Left Wing Assembly