Dan Dec. 6, 2013 – Right wing internal checks before final rivet closure.
So last night I expected tonight would be a lost night due to other commitments. As it turns out, everything opened up and my evening was open. Being below zero F there are few that want to go out so I turned on the heat in my garage and went to work. During the day Tim and I had talked over the alternatives. Rivet the skins as they are without opening it up to tighten down the tie down eye bolt (I had neglected to do this before closing it all up but it was possible to get at it from the inspection hole. On my way home I decided to try and get to the tie down bolt through the access hole by hanging the wing over the edge of the bench. I figured that if it seemed reasonable to torque the bolt down from there I would just either torque it then and there of else if it appeared too awkward I would pull the clecos off the top aft skin and torque the bolt. I messed with the bolt for about a half hour and thought I would try to tighten it from the inspection cover but while I think it was possible, I though it would be much easier (and in the end faster) to pull the top aft skin off. It only took a few minutes to do and once I was ready to begin torquing the nut, I realized that while I had 3 torque wrenches in my shop, only one was well suited for the 200 or so inch lbs for the 3/8 x 24 bolt. Problem was that the 9/16 hex socket required a 3/8″ drive. The only torque wrench I had that would work with any reliability at this setting was (Tim’s) 1/4″ drive torque wrench. I have no 1/4″ drive sockets that go above 1/2″. So, off to the store (Fleet Farm) I went to either get a socket at 9/16″ with 1/4″ drive, an adapter for a 1/4″ socket drive to a 3/8″ ratchet or a new torque wrench. I was not in the mood to go running around town at 8:30 on a cold as heck Friday night looking for wrenches and when the only option available at Fleet Farm was a new torque wrench, I bought it. Back at home it took little time to torque the nut on the eye bolt.

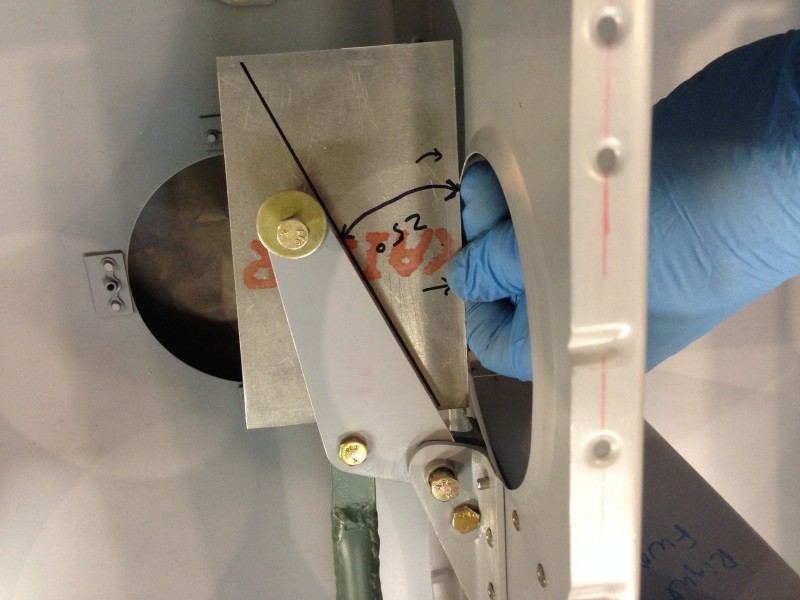
After the bolt I started looking at the bell crank and the control rods and thought about the rigging for the aileron.  It would be possible to do when everything was closed but I could do it much faster with everything open as it was. So, I set up the bell crank by adjusting the short control rod to the aileron length as shown in the drawings at 25 degrees with the aileron at a neutral position.
With this done I decided to connect the long control rod and make sure there were no surprises with interference over the expected motion of the aileron.

As far as I could tell, this all looked good and the pictures show the aileron at full deflection points,
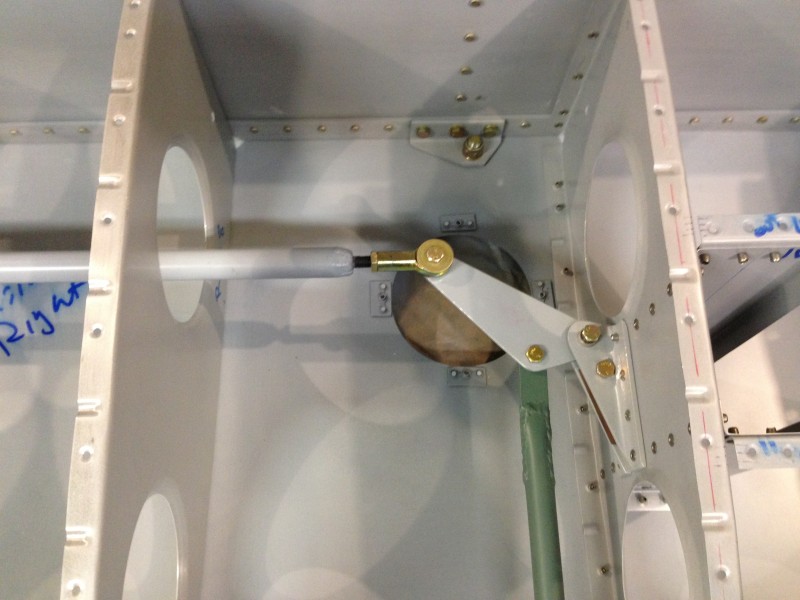

either when the bell crank is at its end of travel of the aileron counter weight stops the aileron from further deflection.


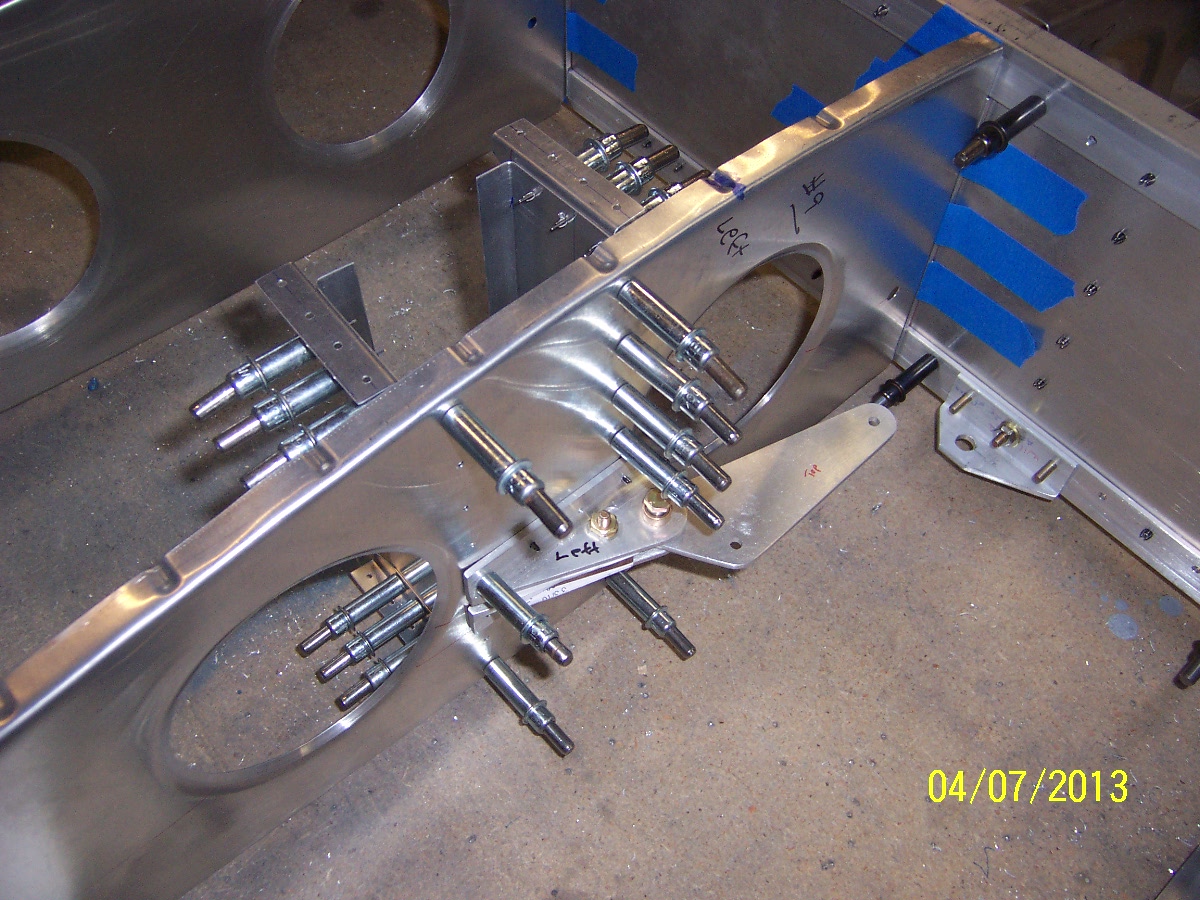
Once again, I ready for final assembly of the wing and this time I think its real. Tomorrow i will close the wing up and then will have to deal with where will put the wing. I am thinking of building a rack on one of the few remaining open walls. We will see how it goes.