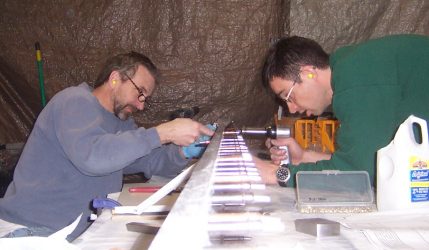
Had some time on Christmas Eve to trim the elevators and from the lessons on the rudder assembly made sure everything was square before cutting out both elevators.
Elevator Trimming
December 24th, 2010 (2 hours)
Trimming the elevators, like the rudder that they share the same control surface basic shape with (Z03-01) needs to be done with some care but after you do the first one the process should go pretty fast. Tim layed our elevators out while I was matchdrilling the rudder. As I realized the rudder was skewed after assembly all construction was halted and we found ourselves struggling to understand what went wrong. As described in the “Rudder Fix” page, the correction was straight forward as was the plan to avoid this problem is the future.
The day after I corrected the rudder I re-marked the elevators after checking them for square and cut them to size. The procedure is pretty easy.
1) Insure your table surface is flat (not necessarilly level but being level in two dimensions is an easy way to insure it is flat). and press your elvator flat to the table.
2) Trim the square end of the elevator so it is actually square. This will be the datum (reference) for the angle cut and needs to form a right angle with the bent edges of the elevator.


2) Clamp the elevator with the proper 2-1/4″ height at the widest point (see SNX Z03-01). We used cleco clamps to hold the elevators in this position and found that marking the overlapped surface when the shape is in the correct spot helps, since re-measuring them every time you take the clamp off is not an efficient way to proceed.
3) Mark the angle at the root end of the elevator. You can lament over this step (like Tim did) for along time but my plan is to simple cut the part slightly long and then trim with a vixen file to the final size to correct for any errors in marking. Since Tim had the parts already marked I simply had to confirm his marks and make any adjustments.

4) Cut the bent edges of the sheet metal with a band saw with the cleco clamps still holding it. We had a piece of wood that we slipped inside the elevator that was cut to an approximation of the final shape but I found that it was useful for the next step (file with vixen) it was not that critical during band saw cutting.
5) Finish cutting the large areas of the elevator skin with large snips and file completed cut to where they were marked with a vixen file.
One other thing to note, small variations in the root rib assembly (one of our root ribs that was clecoed to the elevator horn showed a slight curve when clecoed to the horn) will tend to create an imperfect hinge line along the back of the elevator assembly. Match drilling the root ribs assembly to the elevator skins might be best delayed until the horizontal stabilizer is ready to be mated with the elevator. This way the hinges can get properly aligned and any small adjustment in the attachment of the root ribs to the skins can be done without producing any latent (embedded) strain in the elevator / horizontal stabilizer asssembly.

More Ribs
Mark, drill, cut and debur elevator ribs (T04-01, -02, -03, and -04) and prepar for bending. Also trim elevator rib (ends) along with remake of rudder horn rib (T13-04) because of small error in pattern layout on CAD plot. Ready to bend all horizontal stablizer ribs (T04-xx) as these are all straight bends done with brake. Spend an hour or so going over videos on EAA tips for homebuilts rather than actually doing any work on the plane. I’ve tried a handful of different ways to trim the sheet metal parts near the inside radius cuts and have yet to find a “fast” way to do a good job. I might be nit picking a bit too much but want to do a good job at this base level of part construction.
Spar Channel Replacement
Recut blank for T03-06 and complete replacement part. Begin cutting Z02-03 for elevator ribs
Finished Elevator Rear Spar
Elevator Spars
Begin finishing work on front elevator spar identify cutting front spar pattern from piece meant to be used for rear spar….oops. No big deal. Just cut another rear spar piece. Finished front spar with all holes and bend (T06-03). Begin torturous work on rear spar (T03-02) but after investing at least 2 hours of cutting filing and sanding I realized the center mark was misplaced (off by 1″).


